

DIY: A thousand paper cranes
Posted
The tradition of the thousand paper cranes held together by string, or senbazuru, comes from a Japanese legend, which promises that the wish of anyone who folds 1,000 origami cranes will have their wish granted. This legend has lent itself well to weddings, with many brides choosing to fold 1,000 cranes for their big day, hoping to be granted a long and prosperous marriage.
If you want to include this tradition in your wedding, don't feel like you need to do it all on your own. Enlist your fiancee, your bridal party, or even all of your guests (include a piece of paper and instructions on how to fold a crane in your invitations and ask guests to bring their crane with them to the wedding) to help you. The last thing you need while planning is one more thing you're desperately trying to get done in time.
To get you started, Kara will show you how to fold an origami crane.
I've used plain white paper to make it easier to see, but you can use anything you'd like - origami paper, paper in your wedding colors, or recycled newspaper or old books (do us a favor - really make sure these books aren't good for anything else before you rip them up.) would look fantastic.
How to do it:

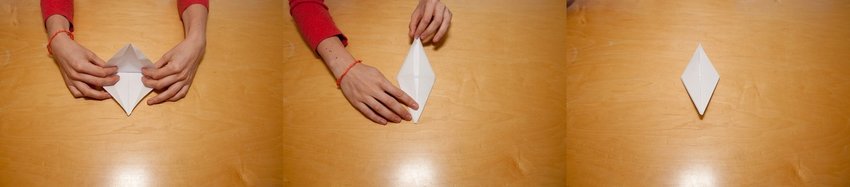
1. Fold in half squarely. Open the paper up, flip it, and fold again to create another line perpendicular to the first.
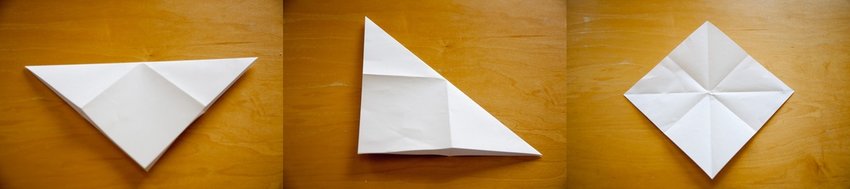
2. Open the paper again, hold one corner and fold it toward the opposite corner, creating a diagonal line. Open the paper, turn it, and repeat the fold with the other corners.
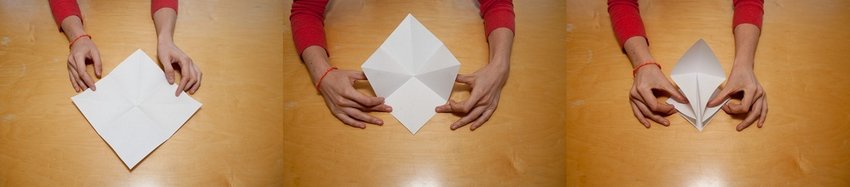

3. Lay the paper with the white side up, one corner pointed toward you. Place your thumbs in the bottom two triangles, reach out, and fold the side folds in until they meet in the middle. Then fold the top down, creating a folded square.


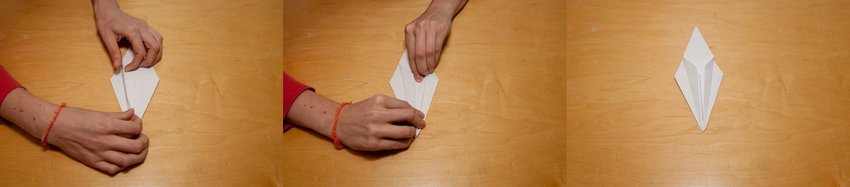
4. Grab one of the top flaps and fold the cut edge in to the center line. Be sure this is a cut edge, not a fold! Repeat with the opposite flap. Flip the paper over and repeat with the remaining two flaps.
5. Grab the top triangle and fold down along the edge of the flaps, creating a firm crease. Flip and repeat.
6. On one side, open the flaps and lay it flat. Flip up the top and lay it flat, bringing in the sides to the center, creating a large diamond. Repeat on the other side.
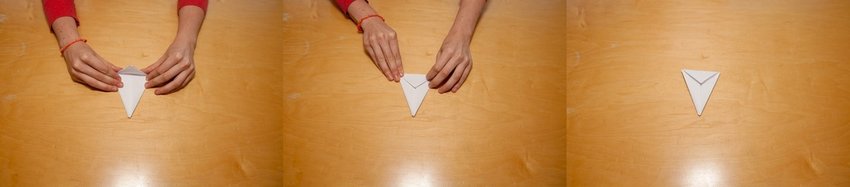
7. Grab one of the the top flaps, and fold the edge in to the center. Be sure to fold in the side without the triangle in the center. Repeat with the opposite flap. Flip over, and repeat on the other side.

8. Fold over one side, so that there are three edges on one side and one on the other. Lay flat. Flip over, and make the same motion, so that there are now two edges on each side. The paper should now have 'ears' at the top.

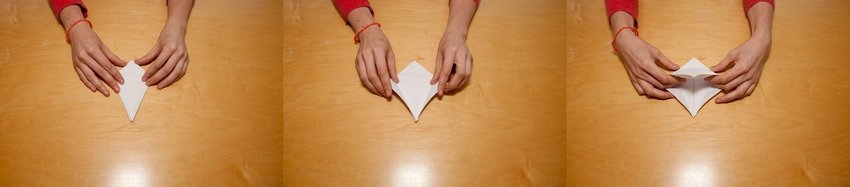
9. Fold up the bottom on both sides, creating a flat bottom.
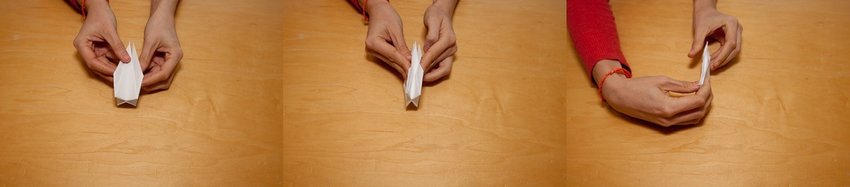

10. Fold over one side so that there are three edges on one side and one on the other. Lay flat. Flip over and make the same motion so that there are now two edges on each side. The 'legs' (which are actually the head and tail) should now be folded in the center.

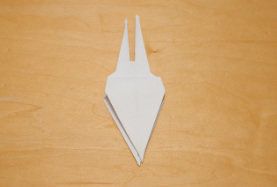
11. Fold down one 'wing' and lay flat. Flip it over and repeat.
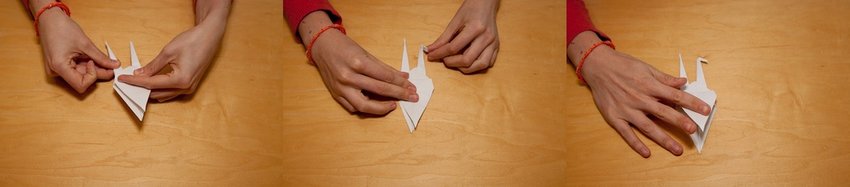
12. Grab one of the small tips and fold down into itself, creating a head. Pull the other back and crease, creating a tail.
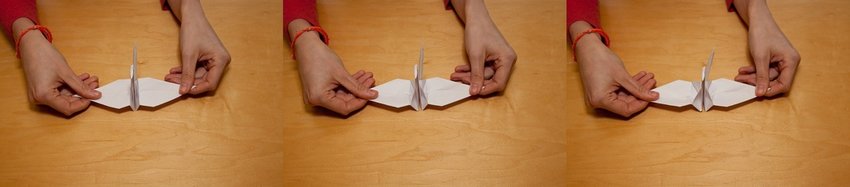

13. Gently pull the wings apart to create a body. And finito! You have yourself a lovely, if possibly slightly messy crane. That's ok! Practice a few and they'll look beautiful. And if you're making 1,000 of them, they hardly all need to be perfect.
Enjoy this project! We'll be showing you a couple of ideas for how to display your creations in the coming weeks.
PS - Find a bigger version of the photos below:
Enjoy this project! We'll be showing you a couple of ideas for how to display your creations in the coming weeks.
PS - Find a bigger version of the photos below:


